
Installing LaunchControl for Blender
LaunchControl is the official BoltRenders add-on for Blender. It prepares your project for a render farm and connects Blender straight to ours, so a job can go from your viewport to a quote without a browser in between. This guide covers getting it installed, finding it, signing in and setting it up.
What LaunchControl Does
Sending a project to a render farm usually means a checklist: make the linked assets local, pack the textures, bake the simulations, gather the add-ons you depend on, and zip the result without forgetting anything. LaunchControl does that checklist for you, from inside Blender, and then hands the finished package to the farm.
It has two halves. The Preparation Suite inspects and repairs the project you have open. The Export / Upload block turns that project into either a portable archive or a job on BoltRenders. Everything else in the panel supports those two.
- It is free with a BoltRenders account, and the preparation tools work whether or not you are signed in.
- It supports Blender 4.x and newer.
- It does not modify your project. It reads your scene and builds a prepared copy alongside it. The exception is the Preparation Suite, which changes your file only when you press one of its buttons and tell it to.
Installing the Add-on
Download BoltRendersLaunchControl-Blender.zip from the LaunchControl page, then use whichever of the two routes below suits you. Do not unzip the file: Blender wants the archive itself.
The Fast Way: Drop the Zip on Blender
Drag the downloaded .zip from your file browser straight onto an open Blender window. Blender opens its install dialog. Confirm it and the add-on is in, already enabled. No preferences, no file browser, one gesture.
This is the same installer the manual route reaches, so the result is identical. If the drag does not register on your system, use the route below instead.
The Manual Way: Install from Disk
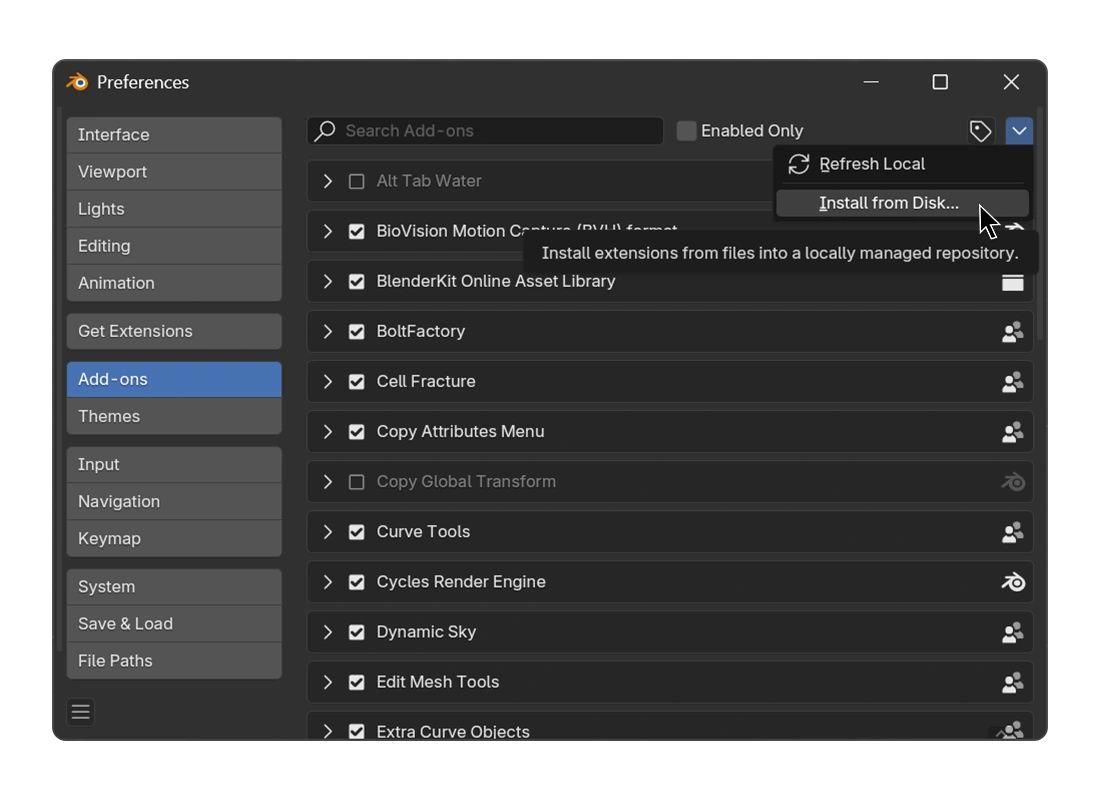
Open Edit → Preferences → Add-ons, then open the dropdown at the top right of the panel and choose Install from Disk.
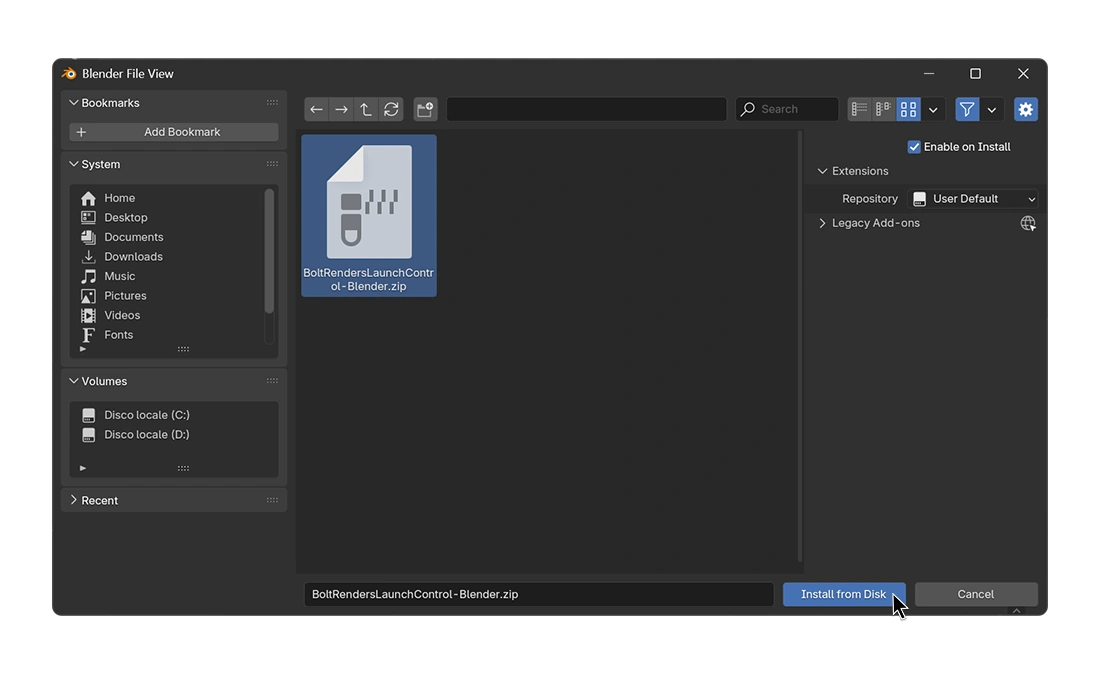
Select the LaunchControl .zip and press Install from Disk. Leave Enable on Install ticked and the add-on switches itself on as soon as it lands.
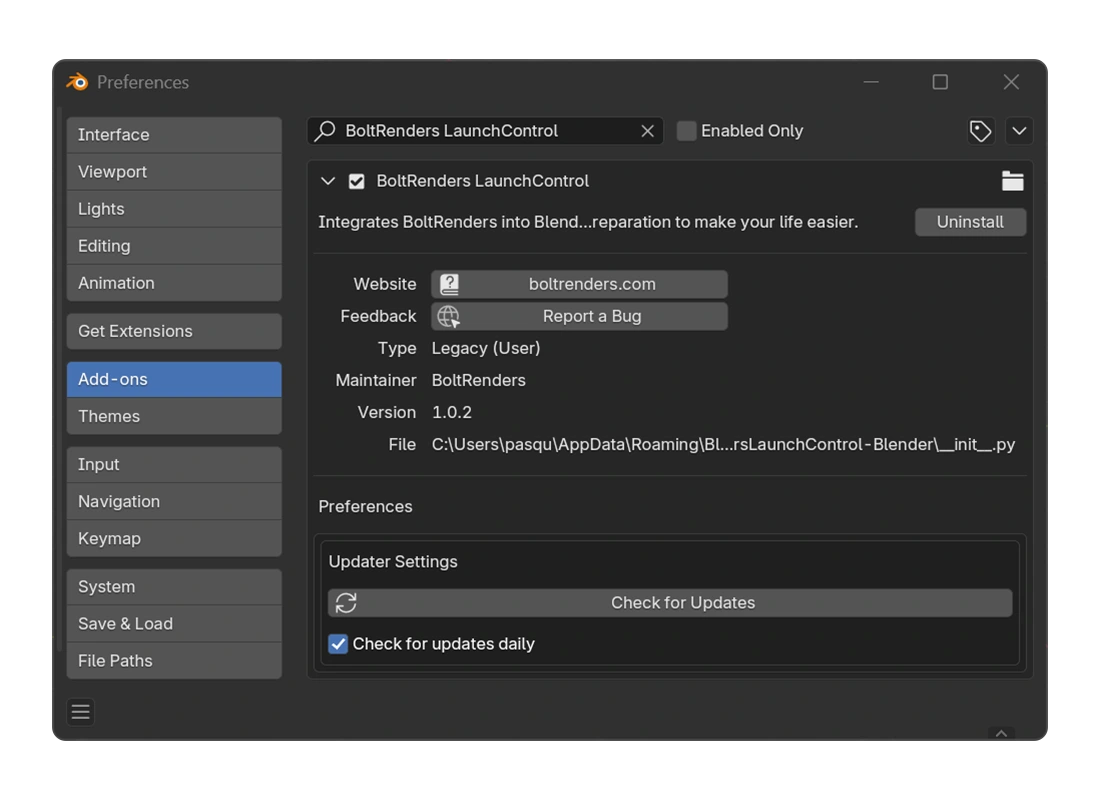
LaunchControl now appears in the add-ons list as BoltRenders LaunchControl. If you unticked Enable on Install, find it in the list and tick the box beside its name yourself.
Where LaunchControl Lives
Press N in the 3D viewport to open the sidebar, then choose the BoltRenders tab. Everything the add-on does is on that one tab, in four blocks.
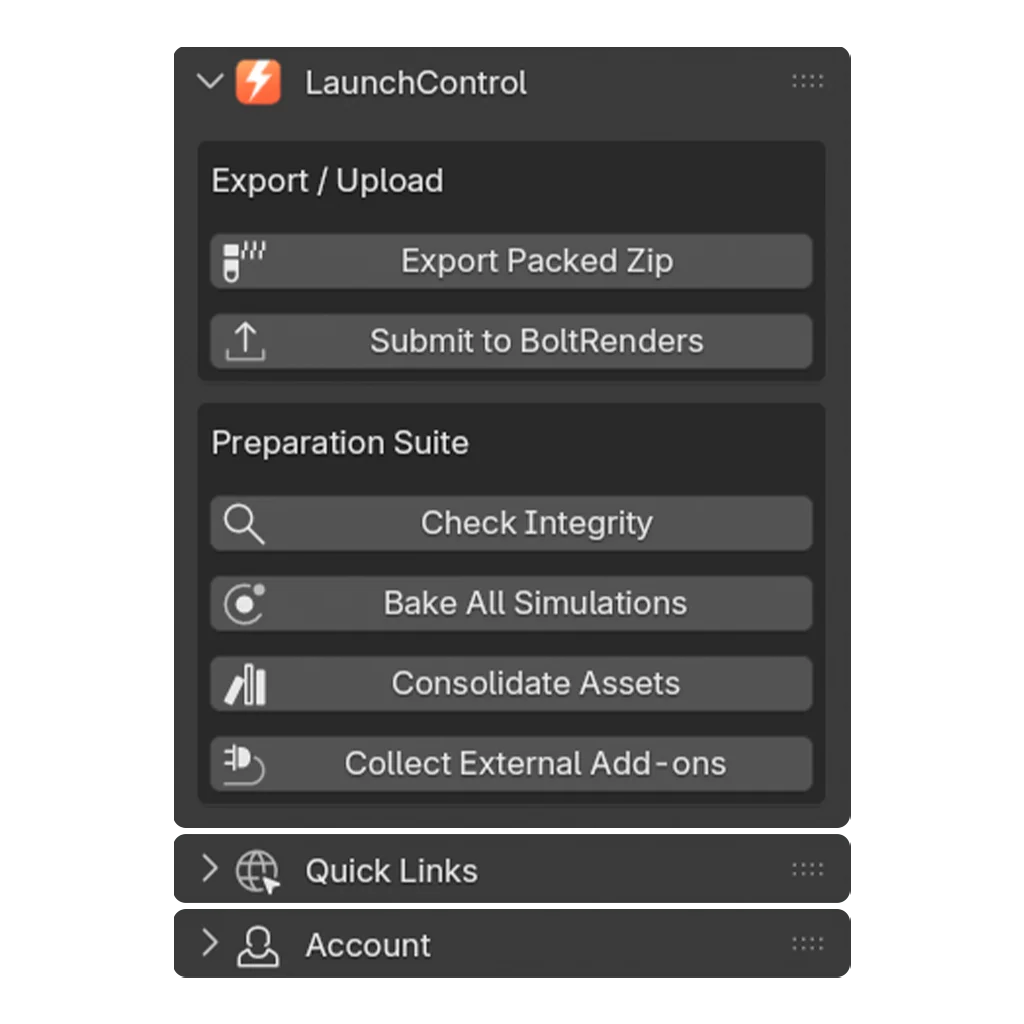
- Export / Upload holds the two actions that leave Blender: Export Packed Zip and Submit to BoltRenders. Both are covered in Exporting and submitting from Blender.
- Preparation Suite holds the four tools that work on the project you have open: Check Integrity, Bake All Simulations, Consolidate Assets and Collect External Add-ons. They are covered in Preparing a project with the Preparation Suite.
- Quick Links is a collapsed panel of shortcuts back to the site, so the pages you need while preparing a job are one click away instead of a hunt through browser tabs.
- Account is where you sign in, and where the add-on reports the jobs you have submitted.
The two action groups sit above the two panels on purpose. Preparation and submission are what you came for; the rest is there when you need it.
Connecting Your BoltRenders Account
Open the Account panel and sign in with the same credentials you use on the website.
Signing in unlocks two things:
- Submit to BoltRenders, which uploads the project and starts an evaluation without you opening a browser.
- Job monitoring, which reports the evaluation and render status of what you have submitted, inside Blender.
Everything in the Preparation Suite, and Export Packed Zip, work signed out. If you only want the preparation tools, you never have to log in at all.
Add-on Preferences
LaunchControl's own settings live where every Blender add-on keeps them: Edit → Preferences → Add-ons, then expand the BoltRenders LaunchControl entry.
Sync Add-ons
In the Export / Upload Settings group you will find Sync Add-ons, which is on by default. With it enabled, LaunchControl collects every add-on currently active in your Blender and ships them with the project, both when you submit a job and when you generate a packed zip.
This is what makes a scene that depends on a third-party add-on render correctly on the farm. Leave it on unless you have a reason not to. The full explanation of what gets collected and when is in Exporting and submitting from Blender.
Keeping It Up to Date
The same preferences carry an Updater Settings group. Check for Updates asks now; Check for updates daily is ticked by default and does it for you. When a new version is available the add-on tells you, and installing it is the same drag or the same Install from Disk as the first time.
Updating matters more than it does for most add-ons, because LaunchControl talks to the farm. The release notes list what each version changed.
Your Project Stays Yours
LaunchControl does not upload anything you have not asked it to upload, and it does not rewrite your .blend behind your back. Export and submission both build a separate prepared copy and leave your working file exactly as you saved it.
The Preparation Suite is the one part that edits your project, and only when you press a button: baking writes cache data, and consolidating packs assets into the file and copies the rest into your project folder. Those are the changes you wanted. Save before you run them if you want a point to come back to.