
How to Set Up a New Render
Starting a render is a short path: upload the project, wait out the free evaluation, read the quote it produces, and choose how fast you want the frames back. Nothing is charged until the last step, and you do not need an account to reach the quote. This guide walks the whole path.
Reaching the Render Page
Every job starts on the render page. Signed in, open your dashboard and press New render at the top of the title bar. Signed out, the same page is reachable from the homepage, and it is open to anyone.
An account is not needed to upload a project or to see what it will cost. It is needed to start the render, and you are asked to create one at that point if you have not already. Signing in first is still worth doing, because the job then appears on your dashboard and you can close the page while the evaluation runs.
If the project is going out of Blender through the add-on instead, Exporting and submitting from Blender covers the other door into the same evaluation.
Uploading Your Project
Click anywhere on the upload area to pick a file, or drag one in from your file browser.
The farm takes a .blend file or a .zip archive holding a Blender project and its assets, up to 10 GB. If the archive holds more than one .blend, you are asked which one to render, so a project with several scene files still goes up in one piece. The upload is sent in parts and a part that fails is retried, which is what lets a large project survive an unreliable connection.
Getting the file into good shape before it leaves your machine is its own job: Preparing a Blender project file covers baking, packing and relative paths.
The evaluation starts on its own the moment the upload completes. There is no submit button after it.
The Evaluation
The evaluation is a real test render of your own project, which is how BoltRenders arrives at a fixed price rather than an estimate. It is free, and it usually runs between 5 and 30 minutes depending on the size and complexity of the file.
Signed in, the project appears on your dashboard immediately and moves through the evaluation statuses while it works. You can close the page. The job record persists, and an email arrives when the quote is ready. Understanding project statuses explains what each one means.
Without an account, stay on the upload page to watch the result arrive, or leave an email address and be notified when it is done.
Reading Your Quote
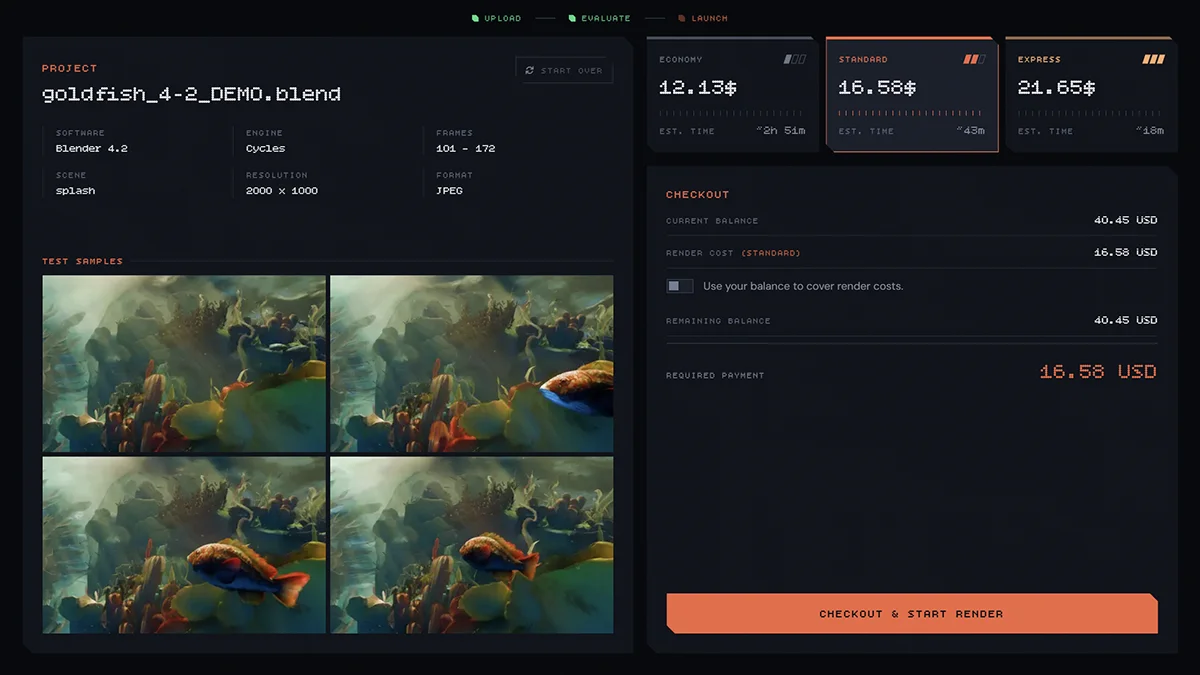
When the evaluation finishes, the render page shows what it found:
- A fixed price. Not a rate and not an estimate. The figure in front of you is the figure you pay, with nothing added afterwards.
- A render time, calculated from your own scene. It starts once the job leaves Initializing, usually 5 to 10 minutes after you launch it.
- Four test frames the evaluation actually rendered.
The test frames are worth looking at properly. They come off the same farm with the same settings as the finished job, so a missing texture or a wrong view transform shows up here rather than in the frames you have paid for.
Choosing Your Tier
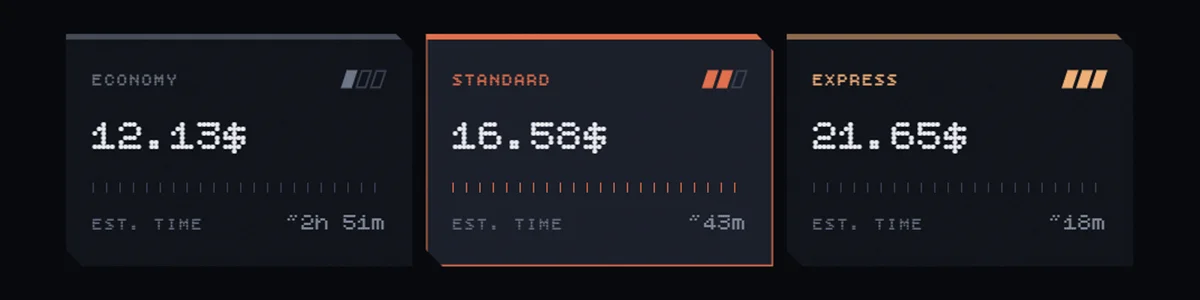
With the quote in front of you there is one decision left: how fast. Three tiers are offered, each carrying its own fixed price and its own render time, both already calculated for your project.
- Economy for the lowest price, when the deadline allows it.
- Standard, the middle of the three on both price and time.
- Express for the shortest delivery time.
The tier is not queue position. Nothing waits behind anything else and every job is treated with the same care. What the tier changes is how much of the farm your render runs on, which is why the delivery time moves and the price with it.
Click a card to select it. Three real prices for your own project sit against three render times worked out from it, so the trade is in front of you rather than in a table of rates.
Payment and Confirmation
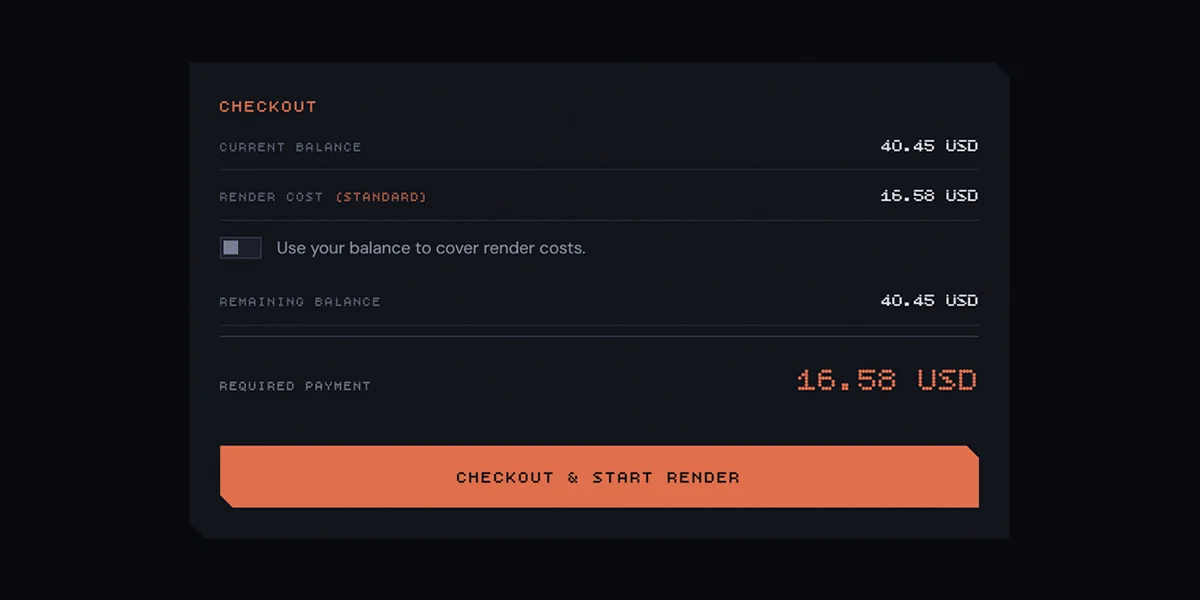
Pressing Start Render opens the payment step. An account is required from here on, so if you are not signed in you are asked to create one before going further.
There are two ways to pay:
- From your account balance, if it holds enough.
- By card.
A checkbox decides whether your balance is spent first and the card covers whatever is left, or whether the card pays the whole amount. Either way the sum charged is the sum quoted.
The render begins as soon as the payment clears, and a confirmation email follows.
Tracking Progress
The job opens in Initializing while the farm assigns the work, and moves to Rendering within a few minutes. Your dashboard follows it the whole way, with a progress bar and a finish time beside the status.
Every state a project passes through, from the upload to the last frame, is set out in Understanding project statuses. That is the guide to open if a job is sitting on a status you do not recognise, or if you want to know what the farm is doing behind each one.
When the job reaches Completed the frames are ready to collect, and they stay available for seven days. Downloading your rendered files covers single frames and full archives.